
The winter issue of Twist Collective went live this morning! And while there are many lovely patterns in it, I’d like to take a moment to draw your attention to mine:

photography by Jane Heller, pattern Trefoil by me!
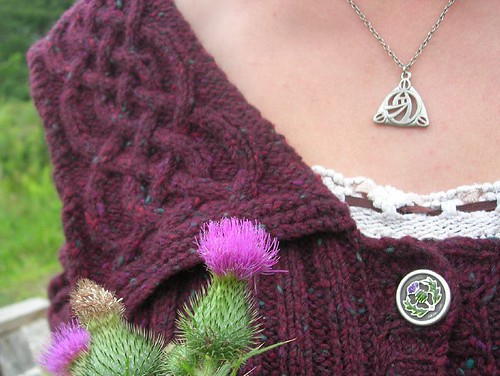
Trefoil is a cabled winter hat and mitten set with an elegant three pointed celtic knot on the crown and a single leaf of the knot mirrored on each mitten. The knot is framed by arching stockinette and trimmed with stretchy i-cord edging.
The idea for Trefoil started a loooong time ago. The idea seemed so simple, a celtic knot on the top of a hat. The decreases for the crown could be worked right into the cable and the cable would repeat three times around the crown, with the crossovers interlocking from each repeat into the knot. If you were reading my blog back then, you might remember the discussion of the hat I was designing. The one with the cable I couldn’t get quite right. The one I knit no less then 15 times! After the first few tries I’d broken down to just knitting the crown over and over and over… I couldn’t get the crossovers to work right. My best try looked like this:

Let’s not even cover how busy the hat looks with the textured background! Eventually I gave up and stuffed the swatch into the back of my closet (in fact, I still have that purple prototype, as well as the knot swatch, hiding there now)
This story becomes a lesson in “why knitting other people’s designs is a good thing” for me. It never occurred to me to try a top-down hat until I was knitting one by another designer. I realized that this approach would allow the crossovers to flow much more smoothly, but I worried that the first cables would bow out, downward, instead of directly across. Taking a page from another greater designer then myself I thought that cabling every row might give the horizontal cable look I needed.

After knitting this one little swatch in DK weight yarn I knew I had solved my problem! But the knot was very small, and would barely cover the crown. So before putting together my submission I knit a second hat in bulky yarn, so I could show the knot in two very different sizes.

I had considered adding mittens to my submission, but didn’t because the hat was my first and main goal for this design. However I wasn’t at all surprised when Kate Gilbert asked if I could add mittens to the pattern to create a set. Of course this provided it’s own challenge. Did I need yet another mitten take on the 3 cornered knot? I decided the mittens should reflect the motif, without mirroring it exactly, in part because I didn’t want to do a third take on that look. But mostly because the aran weight yarn was too heavy to fit a whole knot on a single mitten!

Once I’d finished with knitting the pattern write up provided a whole new challenge. Like many cable designers I work from primarily from charts, and if I include row-by-row directions in a pattern they’re reverse engineered from those charts. But this hat was different, I worked the knot purely from the image in my mind, and noted my stitches as I went. This means I had the row-by-row directions first! Because of the way the stitches shift from one repeat into another this worked especially well in this instance. However I knew, for many cable knitters, I would need charts in the pattern. As a knitter myself I’ll pass right over a cable project if it doesn’t include charts. But I didn’t want to chart the whole repeat, just the first repeat, so when you’re knitting from the charts pay special attention to the rounds that begin and/or end with those vertical colored lines!

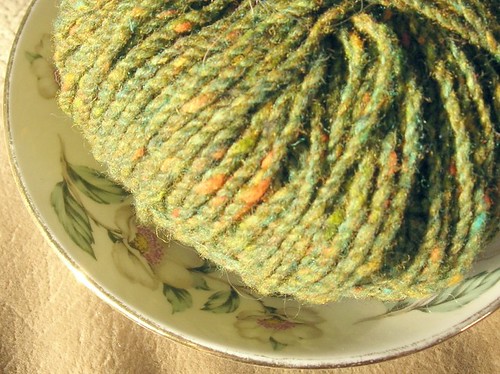
I absolutely loved working with Osprey from Quince & Co. It’s very soft without loosing the stretchy bounciness that I love about 100% wool yarns. The plied texture shows off stitches and cabling very well. That being said, blocking is completely necessary to make the stitches as even as possible. On that note if you’re having trouble getting gauge on this pattern – Block It. Due to the increases in the cables of the crown of the hat the whole thing will need to be stretched horizontally just a touch during blocking for the fabric to lay flat.
And finally, as if that weren’t saga enough, the original name of this pattern was Highland. As in, the scottish highlands, highland cattle, windy highland moors, and celtic knots. But if you search “highland” in patterns on ravelry you’ll get more then EIGHTY results. So I spent some time looking for something properly scottish as a replacement, but in the end it was Kate Gilbert who suggested Trefoil.*
*the girl scout cookies didn’t even occur to me, until someone else mentioned it earlier today! Mmmm, cookies…


Congrats!!
Thanks!
Congratulations! It’s lovely!
I like seeing the progression of your design.
Some designs come together all at once, but this one has a reeeealllllly long progression!
Wow, I’m struggling with the creation of a cable chart that looks a lot like yours. It’s the only thing in my projects page on Ravelry so far. I just started a new Ravelry group called Celtic Cable Knitters, and is specifically for those interested in closed loop cable knitting. I feel over my head for the first time in knitting since I was very young, and I like that challenge.
I love your line, “This story becomes a lesson in “why knitting other people’s designs is a good thing” for me”. While I do read other patterns often for the techniques they teach, I haven’t followed one for years. I’d love for you to have a look at my chart, and tell me how you might approach it differently, as well as how to move forward in my closed loop cabling practice…I don’t seem to be getting anywhere.
It’s good to feel challenged by our knitting from time to time! It keeps us on our toes.
I took a peak at your chart, but I’m afraid I can’t offer much help. The only way I know of to really get a feel for cables is to actually knit them. In fact that’s my best suggestion for you. When I’m designing a new cable I start with a sketch (not a graph, just a sketch of the knot) then I interpret that onto graph paper. I do all this on paper, trying to work things into digital form slows me down as I can sketch the cable crosses I want much more quickly than I can pick them out of a knitting font.
Once I have a rough draft I start knitting. As I go I test different increases, decreases, and crosses to see what looks best. I often have to rip out rows, add purl stitches or M1’s in various places to make the cables flow smoothly. And the only way for me to determine where I need to change things is to test them with real yarn and needles. I note the changes onto the chart as I go, and sometimes I have to redraw and reknit the chart 4 or 5 times to get it right (or 15 times, as in the case for my trefoil hat, I’m not exaggerating – I worked 15 different swatches to get that knot right)
If you have only looked at other designer’s closed loop cables, but not knit them. Then I seriously recommend doing that. Even if you just swatch the cable parts to get a feel for them, that will be helpful. Whether I’m working my own cables or someone else’s I always start out uncertain, and carefully follow the chart. But there comes a point where I’ve knit enough of the chart that I understand how this particular cable works and how it needs to move, and I can work from memory more than from the chart. This transition to understanding the cables only comes with practice knitting, not just from looking at the charts. I’ve heard this from several other experienced cable knitters as well.
For instance, looking at your cable chart I see that you have increases (for instance on row 2) followed almost immediately by decreases (on row 4) I have never seen a horizontal stretch of closed loop cable worked this way. I’m not saying it won’t work, just that it’s unusual, and you should probably swatch that to see if it looks the way you want it to. Check out the chart for my Queen City mitts. I start the horizontal cable with an increase, but then move those stitches rapidly across the background to get a horizontal bar. I don’t decrease again until I get to the point where the cable needs to stop. This is similar to the technique Eunny Jang used for her Tangled Yokecardigan. And I learned the method by knitting Rogue by Jenna Wilson. This is the sort of testing, and learning I suggest you try.
Also feel free to modify any of the charts I’ve already made if that’s helpful to you. Both Queen City and Trefoil have trinity knot charts already drawn up. The knot you’re attempting looks like two nested trinity knots, which is more complex. But maybe looking at my charts would give you a starting point. You’ll need to increase the size of one, and figure out how to nestle a second knot inside the first without throwing off the stitch count. But sometimes starting from something and modifying is easier than starting from scratch.
Once you get this knot worked out let me know how it goes! It looks like it could be beautiful.
~Becky